Step-by-step guide to virtualising a physical machine
Sue Dawson (26/10/10)
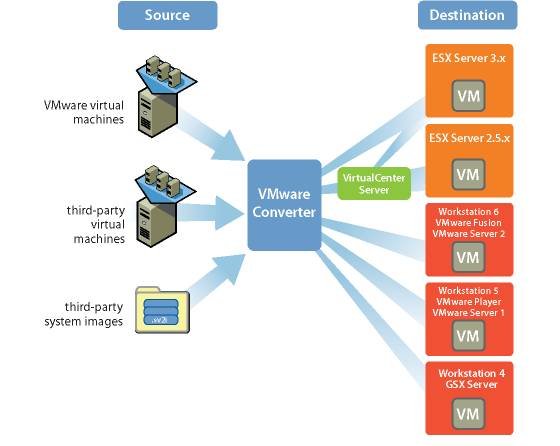
Virtualisation enables a number of virtual machines, running different applications and even different operating systems, to run on one server (or group of servers with pooled resources). Virtual machines have four major advantages over physical machines:
1. Compatibility: Can be run on any standard x86 computer
2. Isolation: If several virtual machines are running on the same server and one crashes, the others are completely unaffected
3. Encapsulation: The machine, its virtual hardware resources, operationg system and applications are all wrapped up inside a software container. This makes it very easy to manage and move around. If there is a problem with the physical server the virtual machine can be very quickly restored to a different server from a backup.
4. Hardware independence: The machine's virtual hardware resources need not match those of the host. This means a virtual machine can be moved from one x86 physical machine to another with no need to configure any device drivers.
1. Download the ‘VMware vCenter Converter Standalone Client’ from VMare and install it on the machine that is to be made virtual (there are alternatives but this is the easiest way of doing it).
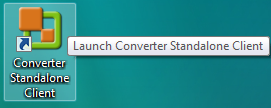
2. Launch the ‘VMware vCenter Converter Standalone Client’ from your desktop or Programs menu.
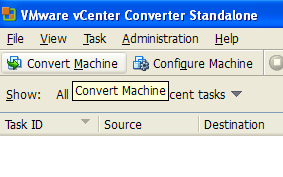
3. Click on "Convert Machine".
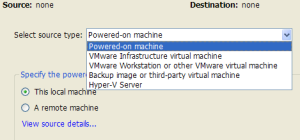
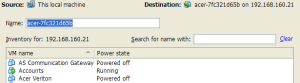
4. Select "Powered-on machine" from the dropdown menu and specify "This local machine". Click "Next" at the bottom of the screen.
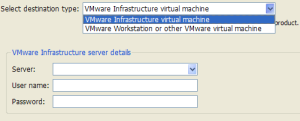
5. Select "VMware infrastructure virtual machine" from the dropdown menu and enter the IP address, user name and password for your server in the boxes. Click "Next" at the bottom of the screen.
6. Choose a name for the new virtual machine and enter in the box. Click "Next" at the bottom of the screen.
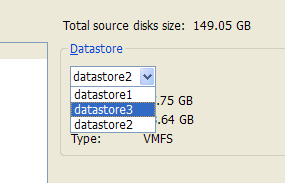
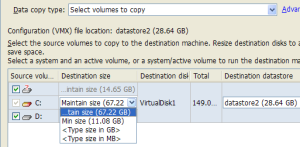
7. Select a datastore from the dropdown menu. Choose one that has enough space for the files on the machine you are going to convert.
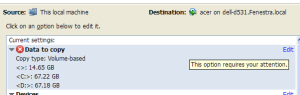
8. The "Data to copy" section of the settings will almost certainly be flagged as needing attention (with a red X). This is because the default setting is to convert the entire hard disk of the physical machine including all the empty space. Click on "Edit" at the right hand end of the panel.
9. Select the desired option from the dropdown menu. "Maintain size" converts everything including the empty space and "Min size" creates only enough space on the new virtual machine for the already existing files.
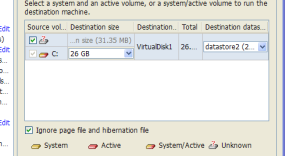
10. Choose <Type size in GB> and enter a size that will allow sufficient space for new files. Ensure that the checkbox for ignoring the page file and hibernation file is ticked. Click "Next" at the bottom of the screen.
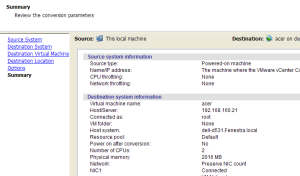
11. The conversion parameters screen will be displayed. Click "Finish" to begin the conversion process.
12. During the conversion process, the task is shown on the main screen of the Standalone Converter with an estimate of time remaining. The conversion can be cancelled at any time by clicking on the task, then clicking on the red button at the top of the screen.